How to Get Neat Scarf Edges When You Knit
Loose side edges come from the first stitch of each row. A slipped-stitch selvedge, steadier tension on the first two stitches and garter borders keep a scarf's sides straight.
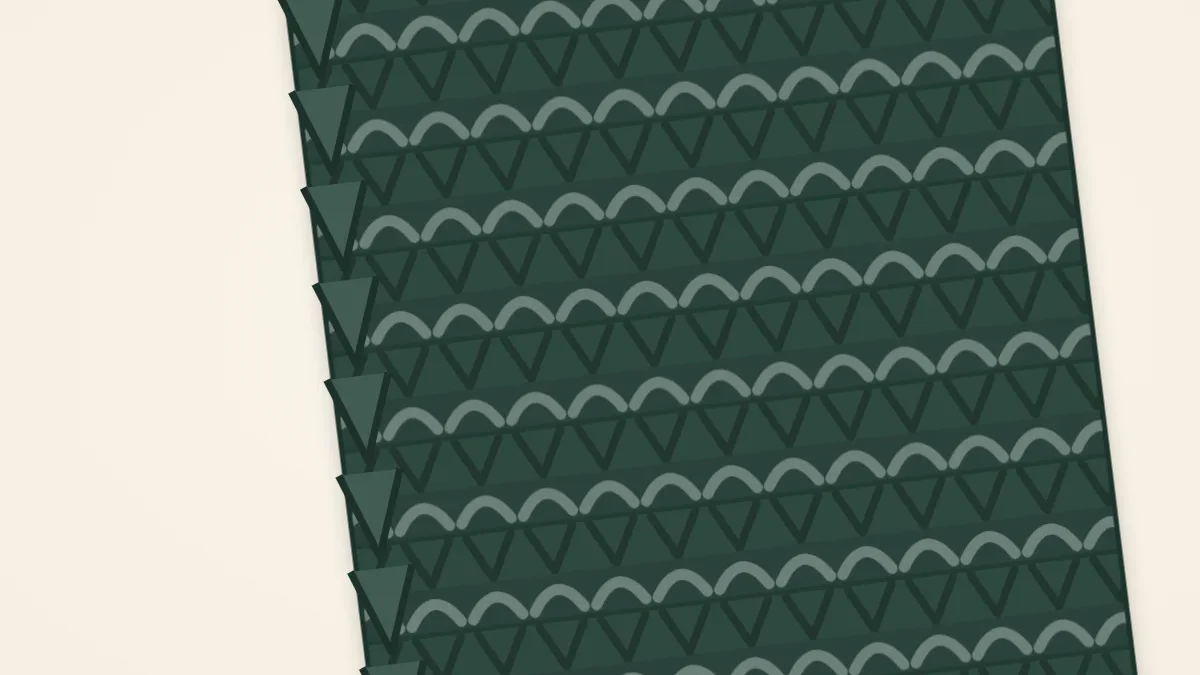
A scarf has two long side edges and nothing to hide them behind. There is no seam, no collar and no button band, so every loose loop along the side stays on show. Most wobbly edges come from one cause: the first stitch of each row is the loosest stitch in the row. Fix that stitch and the edge fixes itself.
Why the edge stitch goes loose
When you finish a row and turn the work, the yarn has to travel around the end of the fabric to start the next row. The last stitch you worked has no neighbor on one side to hold it steady, so any slack in the yarn settles into it. On the next row that stitch becomes the first one you work, and it often stretches a little more as you push the needle into it.
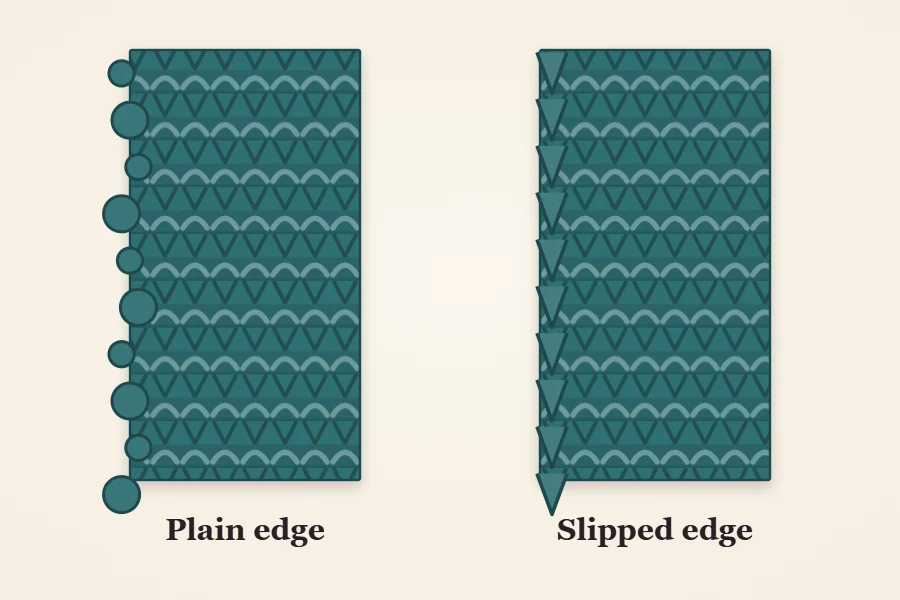
The result is an edge where every stitch is slightly bigger than the ones in the middle of the row. In garter stitch (knit every row) this shows as a line of bumps that are not quite the same size. In stitches with a smooth face it shows as loops that stick out like small ears.
A second, different problem is an edge that steps outward. That is not loose tension but an extra stitch, usually made by bringing the yarn over the top of the needle at the start of a row. If your scarf is getting wider, count your stitches and read the guide to common first-scarf mistakes before you change anything else.
The slipped-stitch edge for garter
The most reliable fix is a slipped-stitch selvedge. Selvedge simply means the side edge of the fabric. Instead of knitting the first stitch of the row, you pass it from the left needle to the right needle without working it. That stitch now spans two rows, which uses up the slack and leaves a tidy chain along the side.
The abbreviations used here are sl (slip), st (stitch), wyif (with yarn in front), wyib (with yarn in back), RS (right side) and WS (wrong side). For a garter scarf, work every row like this:
- Hold the yarn in front of the work, toward you.
- Insert the right needle into the first st as if to purl, from right to left, and slide the st across without working it (sl 1 purlwise wyif).
- Take the yarn to the back by passing it between the two needle tips, not over the top of the right needle.
- Knit to the end of the row, including the last st.
Slipping purlwise keeps the stitch untwisted. After a few inches you will see a line of V shapes running up each side, one V for every garter ridge, since each ridge is two rows.
Watch out
In step 3 the yarn must go between the needles. If it travels over the right needle instead, it lays an extra loop there, and on the next row that loop looks like a stitch. One accidental loop per row is enough to turn a rectangle into a wedge.
Slipped edges on other stitch patterns
The idea carries over to fabrics that have a knit side and a purl side, but the yarn position changes. A simple rule covers most cases: slip the first st purlwise with the yarn held on the wrong side of the fabric. On an RS row that means wyib, and on a WS row it means wyif. Then work the rest of the row as the pattern says.
Ribbing and other reversible textures do not always need a slipped edge. In a garter stitch scarf the chain edge is a clear improvement, while a rib that starts and ends with knit stitches on the right side already rolls its edge stitch slightly toward the back, which hides small differences in size. Try the pattern as written for a few inches before adding a slip.
Keeping the first stitches even
If you prefer to work every stitch, you can still get a neat edge by controlling where the slack goes.
- Snug the second stitch, not the first. Work the first st normally, then give the yarn a gentle tug as you work the second. Pulling hard on the first st alone only shifts the slack to its neighbor.
- Work the last stitch close to the needle tip. Stitches stretched over the thick part of the needle while you fumble with the turn end up larger.
- Turn the same way every time. A consistent turn keeps the yarn wrapping around the edge in a consistent path.
- Do not stop mid-row. Putting the work down halfway across can leave a visible loose spot. Finish the row first.
Garter borders for fabrics that roll
A slipped stitch tidies an edge but does not stop a fabric from curling. Stockinette (knit on the RS, purl on the WS) rolls toward the back along its sides, and no selvedge will flatten it. The usual answer is a border of stitches worked in garter on both sides of the scarf: knit the first three and last three stitches of every row, RS and WS alike, and keep the pattern stitch between them. The full explanation is in the article on why knitted scarves curl.
You can combine both ideas. Slip the first st of every row purlwise wyif, take the yarn back, knit the next two border stitches, work the center, then knit the last three.
Which edge to use
| Edge treatment | How it is worked | Best for | Trade-off |
|---|---|---|---|
| Plain edge | Work every stitch of every row | Ribs, seed stitch, edges that will carry fringe or a seam | Depends entirely on even tension |
| Slipped garter edge | Sl 1 purlwise wyif, yarn back, knit across | Garter scarves in one color | Slightly firmer edge; fewer edge loops |
| Slipped edge, yarn on WS | Sl 1 purlwise wyib on RS rows, wyif on WS rows | Fabrics with a distinct right side | Two yarn positions to remember |
| Garter border | Knit 3 at each end of every row | Stockinette or any stitch that rolls | Adds 6 stitches to the width |
What not to do
- Do not switch methods partway. A scarf that is slipped for 20 in (51 cm) and plain for the rest will have two visibly different edges. Decide on row 1.
- Do not slip on a color-change row. In stripes, the first st of a row in a new color has to be knitted with the new yarn, or the old color is dragged up into the new stripe.
- Do not slip knitwise by accident. It twists the stitch and breaks the chain. If one V in the line looks crossed, that is the cause.
- Do not join a new ball in the middle of a row if you can avoid it. Joining at the start of a row puts both tails at the side, where they are easier to hide. See how to weave in ends for the method.
- Do not count on blocking to rescue the edge. Pinning a damp scarf straight evens out gentle waves, as described in the guide to blocking a knitted scarf, but it will not shrink a stitch that is twice the size of its neighbors.
Tip
Before starting a scarf, cast on 12 stitches and knit 20 rows with the edge you plan to use. A small strip is enough to show whether your edge is even, and it takes far less time than ripping out a scarf.
Frequently asked questions
Should I slip the first stitch of every row on a scarf?
On a one-color garter scarf it is a simple way to get a tidy chain edge, so it is worth doing. On ribbing, seed stitch or striped scarves it is optional, and on color-change rows you should knit the first stitch instead.
Do I slip the stitch knitwise or purlwise?
Purlwise. Inserting the needle as if to purl moves the stitch across without twisting it, which keeps the chain along the edge smooth.
Can I fix uneven edges after the scarf is finished?
Blocking can straighten gentle waves, especially in wool, but it cannot change the size of individual stitches. Badly uneven edges need to be reknit, so test your edge on a small strip first.